Open topic with navigation
You are here: Reference > Table Details > System Notifications Table
System Notifications Table
 Overview
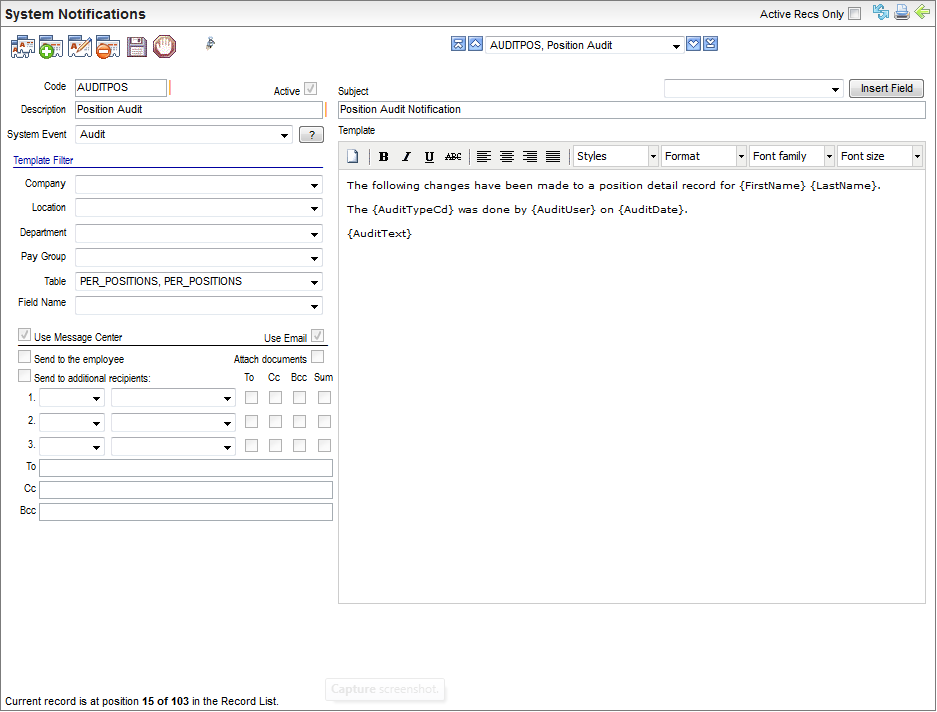
System Notifications Table
Fields on the System Notifications Table
- A Code
(required) is ten characters or less with no spaces or special characters. Keep it short: 10 characters or less with spaces. Avoid punctuation and special characters in a code name.
- Enter a Description
of thirty characters or less. Keep it clear and specific. This helps you – and others – know what this should do.
- Active?
An active record is available for use by system processes.
- System
Event. Select
a pre-defined system event. Look at the name of the event. Click on the “?” button to see a description of what the event does.
See System Events for Notifications. The system event selected determines what triggers a notification and the dataset
of fields that can be used.
- Subject. A shorter subject line is better. Keep in mind how long the template fields will make this.
To insert a field in the subject line
Be sure that you are adding, editing, or cloning a record.
- Click in the Subject line. You'll want to see your cursor "blinking". Where it is blinking is the insertion point.
- From the selection list next to the "Insert Field" button, select a field.
- Click on the "Insert Field" button.
Template Filter
The template filters restrict who a notification is about in a granular way. Every selected filter works to exclude who this system notification can be about. For instance, if one department is selected, who this is about is filtered to only that department. The available template filters depend on the selected System Event.
Send Notification
- Use Message Center? To show a notification in an employee's Message Center inbox, select the "Use Message Center" checkbox.
- Day(s) before. Some system events are designed to trigger notifications based on a number of days before the event is scheduled to occur. Those system events will cause a "days(s) before" field to display next to the "Send Notification" checkbox. When "days(s) before" displays, enter a number of days.
- Use Email? To allow a system notification to be sent to email systems (outside the system), select "Use Email". For emails to process, this requires an email address on each recipient's Employee ESS PIN Detail record and for applicants/candidates to have emails for candidate
self service. Any email system can be used with this, such Microsoft©
Outlook©
or a web-based email program.
- Send to Additional Recipients? Additional recipients are everyone defined under "Sent to Additional Recipients" on the lines for: 1, 2, 3, To, Cc, and Bcc. If any of these fields are completed, select the checkbox for "Send to Additional Recipients." Except for summary, which is a summarized, pre-defined message, these checkboxes follow typical naming for emails or memos. "To" is for a direct, additional recipient, "Cc" is for a copy of the message (Cc recipient) and "Bcc" is for a silent copy (Bcc recipient).
- The first three lines for additional recipients use types and codes to automatically route messages based on system setup. The types are SUPERVISOR, TIERMGR, and WORKGROUP. These recipients can have the "Sum" checkbox selected instead to roll-up messages into a system-defined message whenever possible.
- 1. If an additional recipient is an individual or a workgroup in the system, select the type of recipient, then the relevant code, and choose a checkbox for To, Cc, Bcc, or Sum.
- 2. If an second recipient is a workgroup or an individual in the system, select the type of recipient, then the relevant code, and choose a checkbox for To, Cc, Bcc, or Sum.
- 3. If an additional recipient has an employee record in the system, select the type of recipient, then the relevant code, and choose a checkbox for To, Cc, Bcc, or Sum.
- To. For a direct recipient who doesn't meet the other criteria, a specific email address can be typed on the To line. This can be an individual's email, a group email address for your organization, or even an external email address, such as an email address for a third-party. While some users have entered multiple email addresses on this line, separated by semicolons, it is recommended to limit this to one email address per line.
- Cc. To copy the message to a recipient who doesn't meet the other criteria, a specific email address can be typed on the Cc line. This can be an individual's email, a group email address for your organization, or even an external email address, such as an email address for a third-party. While some users have entered multiple email addresses on this line, separated by semicolons, it is recommended to limit this to one email address per line.
- Bcc. To silently (known as a blind copy) a message to a recipient who doesn't meet the other criteria, a specific email address can be typed on the Bcc line. Since the recipient will not be clearly identified, this can be confusing if someone is a Bcc recipient and is not aware that he or she has been defined as a Bcc recipient on a system notification setup. While some users have entered multiple email addresses on this line, separated by semicolons, it is recommended to limit this to one email address per line.
Create calendar event
Many of the system events enable the calendar event fields to become available on System Notification setup. These are for the Event Calendar that is available from the calendar icon on the upper navigation bar and that is available to employees who have access to the standard "Time Off Requests" screen.
- Create calendar event? To identify that a calendar event should be created, select "Create Calendar Event".
- Create event for the employee? To create this event on the employee's view of the calendar, select "Create Calendar Event".
- Create event for the following? To create this event on calendars for additional recipients, select "Create event for the following" and also define at least the first line underneath.
- Create event for the following 1.: To expand who else should be able to access this on the calender, select the type of recipient and a corresponding code.
- Create event for the following 2.: To expand who else should be able to access this on the calender, select the type of recipient and a corresponding code.
- Create event for the following 3.: To expand who else should be able to access this on the calender, select the type of recipient and a corresponding code.
Template
- Template. Enter
the message in the template. Type
in the template notification area. Insert fields by positioning the cursor in the template, selecting a field token next to the "Insert Field" button and clicking on "Insert
Field" button. The template provides a rich text editor with additional features to add links and formatting.
To insert a field in the body of the message
Be sure that you are adding, editing, or cloning a record.
- Click in the main area for the message (called the "Template"). You'll want to see your cursor "blinking" in the template area. Where it is blinking is the insertion point.
- From the selection list next to the "Insert Field" button, select a field.
- Click on the "Insert Field" button.